Assets
Assets in ProtoTwin are preconfigured models that can be imported into the digital world to speedup the creation of larger models and systems. You can create and publish your own assets under an organization you are a member of (to reuse in other models) or import an existing asset from ProtoTwin’s standard library.
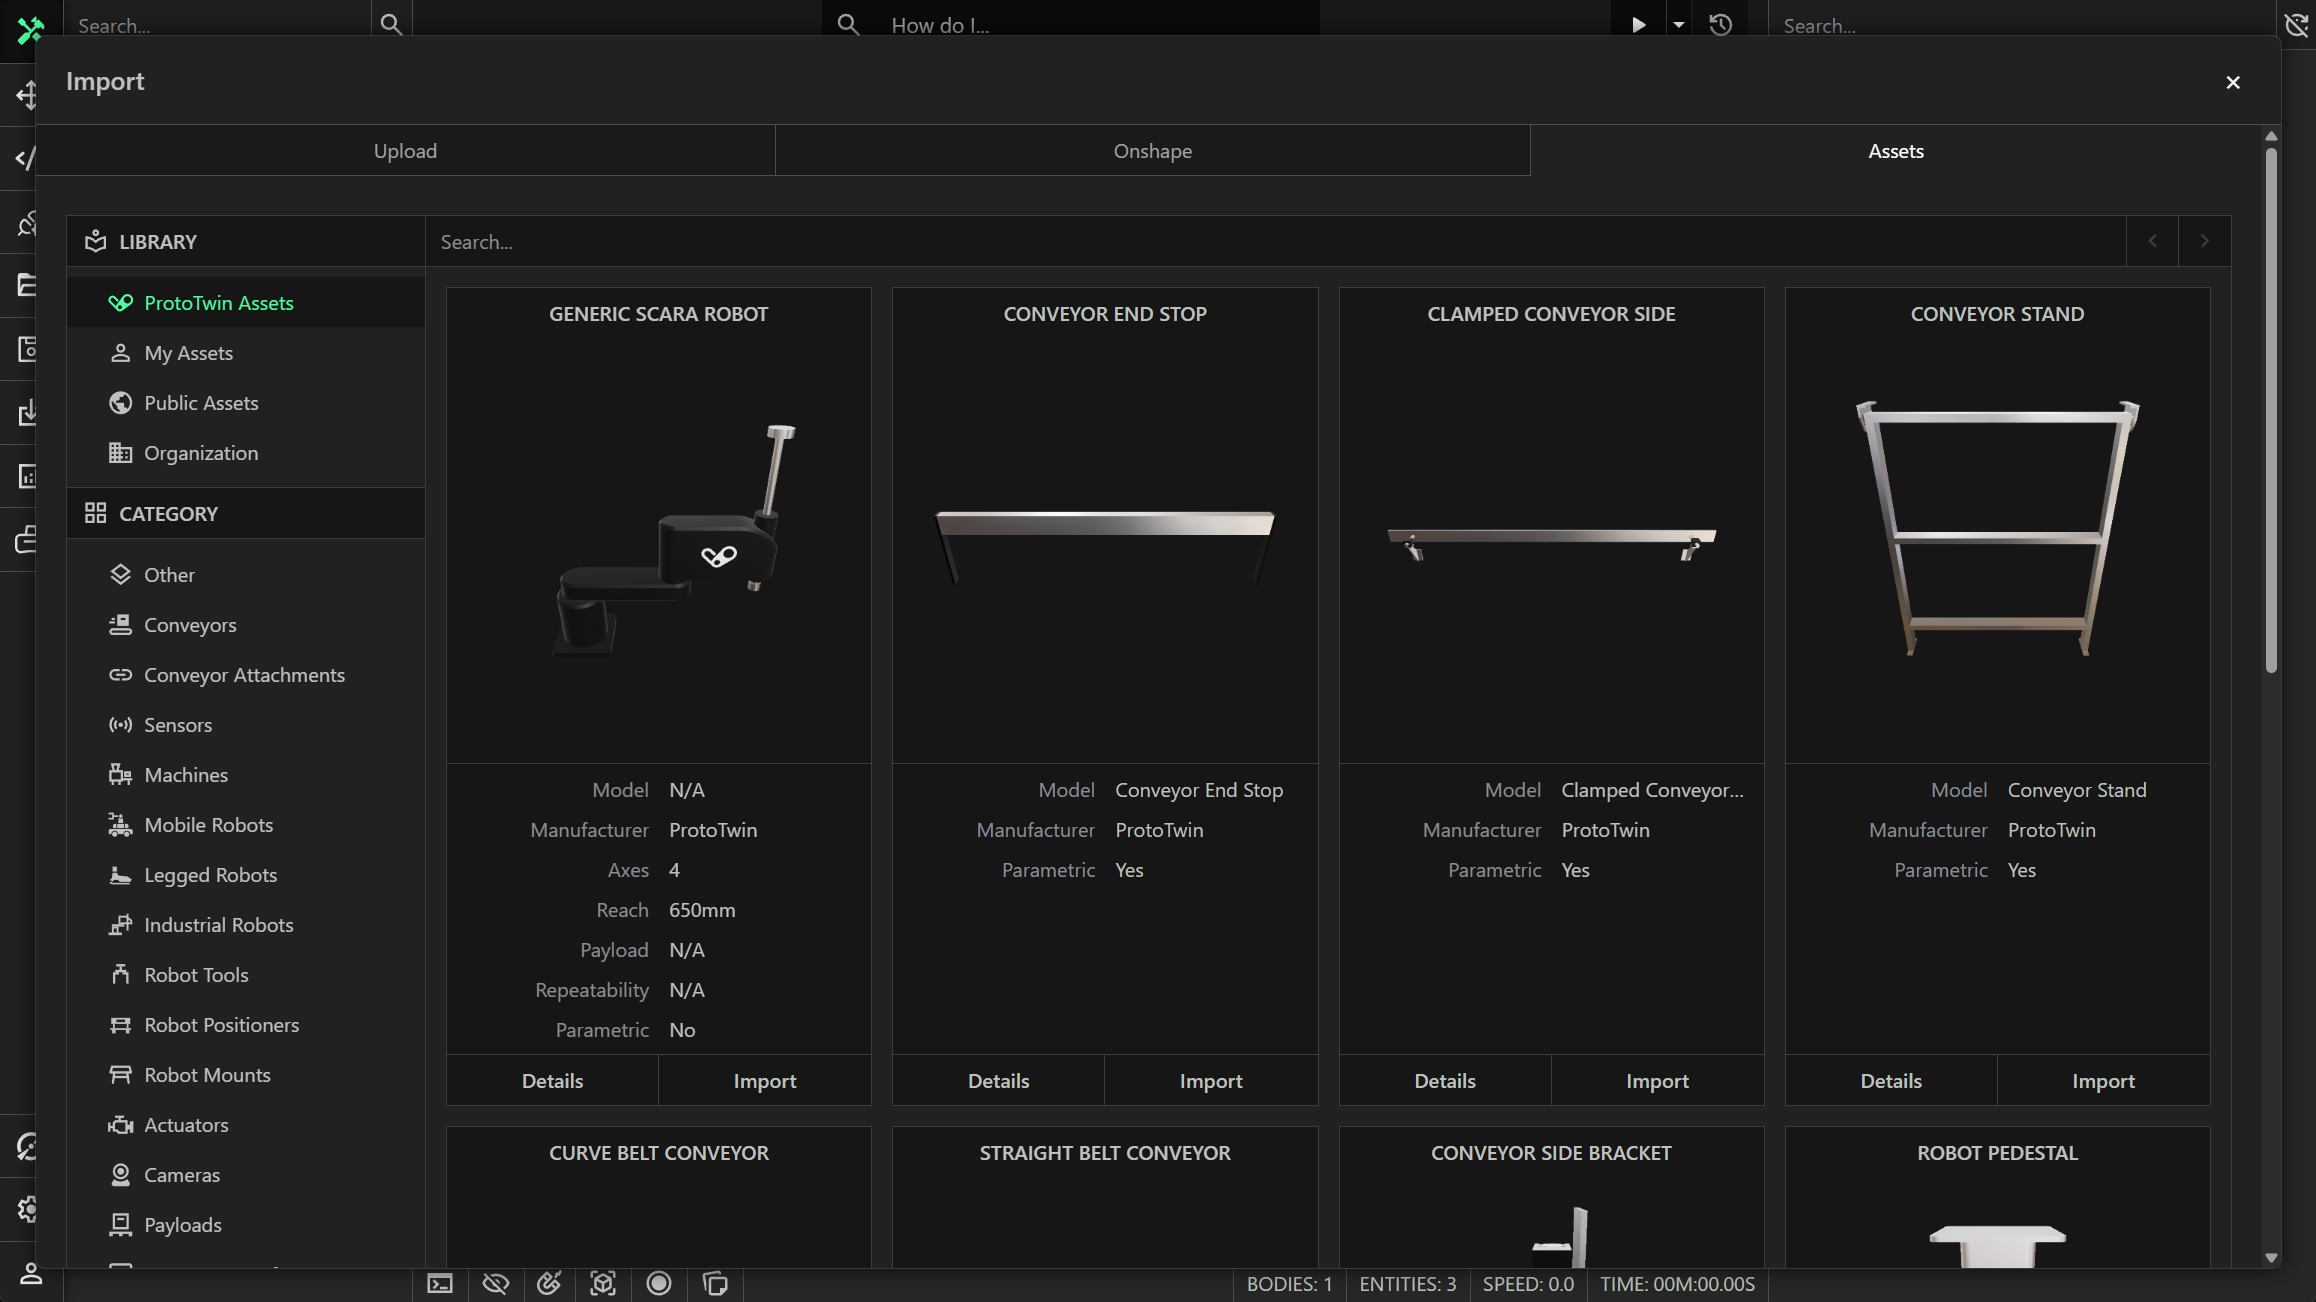
Importing Assets
To import an asset into the simulation environment, you must do the following:
- Click the import button in the toolbar.
- Click the assets tab to open the asset explorer.
- Click the import button underneath the asset.
Asset Explorer
The asset explorer displays all public assets that were created in ProtoTwin. You can search for an asset by name, filter the assets by category, or filter by library.
Libraries
You can filter the display of assets through any of these libraries:
- ProtoTwin Assets: These are the public assets created by us.
- My Assets: These are the public and private assets created by yourself.
- Public Assets: These are the public assets created by anyone.
- Organization Assets: These are both public and private assets created under an organization you are a member or owner of.
Categories
You can filter the display of assets through any of these categories:
- Other: Use this category for assets not belonging to any of the other categories listed below.
- Conveyors: Transport material from one location to another, such as straight belt conveyors, curved belt conveyors, roller conveyors, etc.
- Conveyor Attachments: Parts that can be attached to the side of a conveyor, such as brackets, stands, end stops, etc.
- Sensors: Devices used to detect physical objects.
- Machines: Gantries, case erectors, presses, palletizers, packaging machines, etc.
- Mobile Robots: Automated Guided Vehicles (AGVs), Autonomous Mobile Robots (AMRs), drones, etc.
- Legged Robots: Hexapod, Quadruped, Bipedal and Humanoid robots.
- Industrial Robots: Articulated, Collaborative (Cobots), SCARA, Delta (Parallel) and Palletizing robots.
- Robot Tools: Mechanical grippers, suction grippers and other End-of-Arm Tooling (EOAT).
- Robot Positioners: Motorized devices used to hold, rotate and tilt a workpiece, enabling industrial robot arms to reach it easily.
- Robot Mounts: Physical structure that a robot base can be securely attached to.
- Actuators: Linear and rotary parts that can move such as pushers or indexing tables.
- Cameras: Mechanical devices used to capture images.
- Payloads: Cardboard boxes, bottles, pallets and anything else that can be transported by conveyors or gripped by a robot.
- Operator Interfaces: Human-Machine Interfaces (HMIs), control panels, push buttons, switches, etc.
- Scenery: Warehouses, forklifts, racks, bins, workbenches, signs, etc.
- Graphics Materials: Detailed materials applied to a mesh, used to provide textures or color to objects in the scene.
Creating Assets
To create an asset, the process is the same as creating any model in ProtoTwin. You import the CAD file into the application, then you add components to define behavior to individual parts. The only real difference between assets and models, is that you cannot publish an asset containing scripts. This decision was made purposefully to prevent potential scripting conflicts when importing an asset into a model that already contains local scripts.
To create an asset with scripted behavior, you must first publish a package containing any components and tools you wish to use, then install the package using the package manager. You can then add components defined in the package to entities just like you would normally do when creating a model. Since ProtoTwin uses the package manager to resolve scripting conflicts, you must publish a package containing scripts before publishing an asset.
Publishing Assets
Assets must be published under an organization.
Organizations
The manager of an organization, along with any members, will have access to any private assets published under the organization. The manager can publish an asset themselves, but may also permit members to publish assets.
Joining an Organization
To join an organization as a member, ask the manager of the organization to invite you to the organization. Once invited, you should receive a verification email. Once you’ve received an email, click the link in the email to join the organization.
Creating an Organization
You can create an organization. After manual approval, you will become the manager of the created organization. This will allow you to publish assets under the organization. You will also be allowed to invite other users to join your organization, as members. Members of the organization may also be permitted to publish assets under the organization.
Asset Format
Assets are published through the script editor. The following files are mandatory:
- asset.json: Defines the asset name, title, visibility, category, compatibility and metadata properties.
- README.md: Describes the contents of the asset. The README.md file will be rendered when viewing details about the asset in the asset explorer.
The asset.json file must contain a JSON object with the following properties:
- Name: The name for the asset including the organization scope -
@organization/asset-name. - Title: The title for the asset.
- Public: Whether the asset should be publicly visible to users who are not a member of your organization.
- Compatibility: The version range of the software the asset is compatible with.
- properties: The metadata for the asset.
Please see the illustrative example below for the asset.json file:
{
    "name": "@prototwin/straight-belt-conveyor",
    "title": "Straight Belt Conveyor",
    "public": true,
    "category": "Conveyors",
    "compatibility": ">=1.2.0",
    "properties": {
        "manufacturer": "ProtoTwin",
        "model": "Straight Belt Conveyor",
        "parametric": true
    }
}
For industrial robots, you will need to provide these additional properties:
{
    "properties": {
        "axes": 0,
        "payload": "",
        "reach": "",
        "repeatability": ""
    }
}
Publishing
To publish an asset, follow these instructions:
- Right-click in the file explorer and select Add Item from the context menu.
- Select Asset Definition from the dropdown, choose an appropriate Category, then click Add to create the required files.
- Update the README.md and asset.json files by entering the required information.
- Right-click the asset.json file in the file explorer and select Publish Asset from the context menu.
Scripting
Assets can be imported into the digital world programatically by calling the importAsset() function on the world. The AI agent Torq can import an asset into the scene by executing the run_script tool:
import type { World } from "prototwin";

export default function(world: World): void {
    const entities = await world.importAsset("@prototwin/ufactory-xarm-6");
    console.log(entities.map(entity => entity.name));
}
Please see the API documentation for more information.